Quickstart — Your First Hour
Welcome. Pick the track that matches your job. Each one is a short path through the system that gets you productive fast — you can read the deeper guides later when a specific question comes up.
Where everything lives
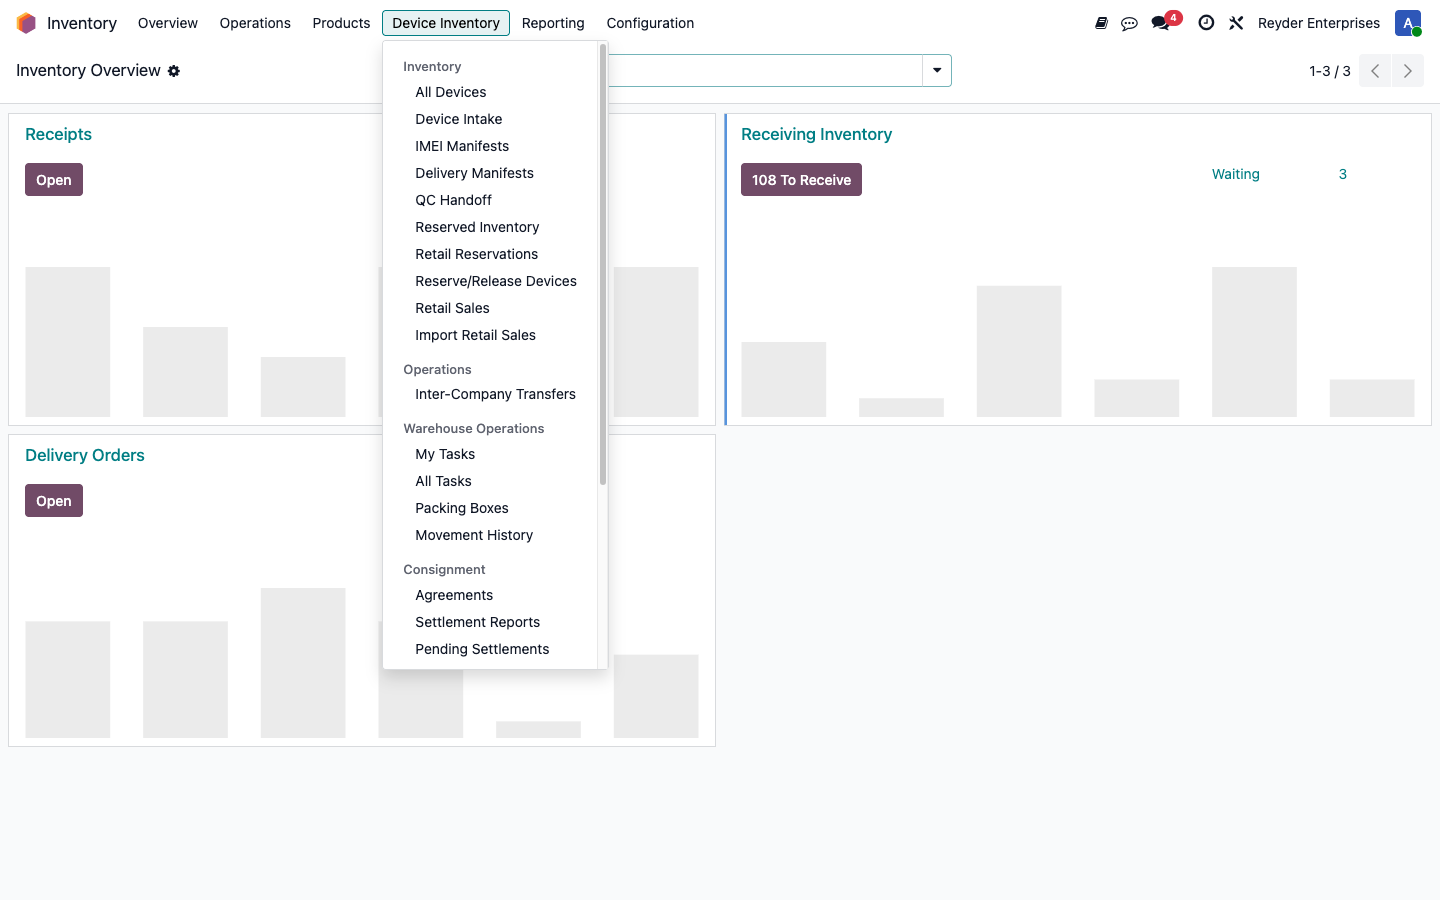
Device Inventory is a submenu inside Odoo's Inventory app. From the home screen, click Inventory, then open the Device Inventory menu at the top of the page.
Training a team?
Use User Handoff Guide as the training checklist, then run the full End-to-End Walkthrough together before users work in production.
Pick your track
What you do: receive devices from suppliers, scan IMEIs, move devices through QC, hand them off for sale, pack and ship.
Jump to: Warehouse track ↓
What you do: create sales orders, allocate devices to customers, confirm orders so warehouse can ship, keep an eye on the IMEI Manifest and Packing Boxes for each order.
Jump to: Sales track ↓
What you do: reconcile settlement reports (what Axis Mobile is owed vs. what Reyder earned), match vendor bills, mark reports as paid, pull GL detail for month-end.
Jump to: Accounting track ↓
What you do: everything. Set up consignment agreements, configure accounts, run the whole flow end-to-end, handle exceptions.
Read in order: the three tracks above, then Setup & Configuration.
Warehouse track
You're receiving devices from a supplier, testing them, and handing them off as ready-to-sell stock.
1. Open the receiving list
Go to Inventory → Device Inventory → IMEI Manifests. This is every incoming shipment — past, in-progress, and today.
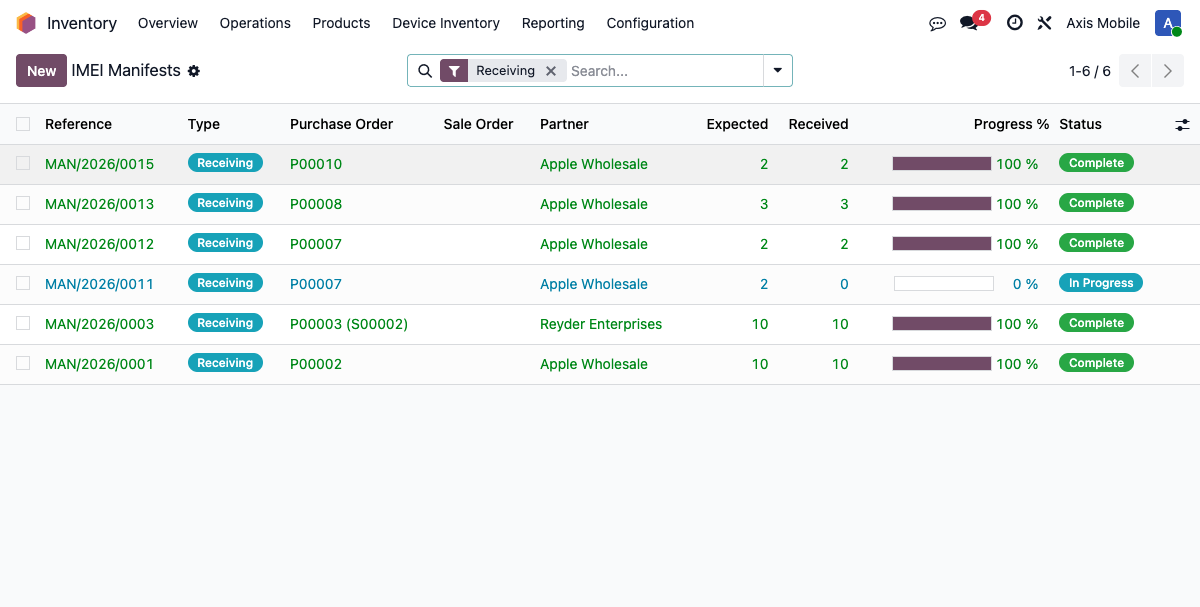
What the columns mean:
- Reference — the manifest number (e.g.
MAN/2026/0032). - Purchase Order — the PO this shipment fulfills. Click it to see the order detail.
- Partner — the supplier that sent the devices.
- Expected / Received — how many IMEIs the PO said to expect vs. how many you've scanned in.
- Status —
Ready(PO confirmed, nothing scanned yet),In Progress(some scanned),Complete(all scanned).
Open the manifest with status Ready that matches today's shipment.
2. Scan IMEIs into the manifest
On the manifest form, click Start Manual Receiving or Continue Receiving. Then scan each IMEI in the receiving wizard or barcode screen. Each scan:
- Creates the device record (IMEI becomes a
stock.lot) - Sets its location to Receiving
- Marks the manifest line as received
Keep scanning until the Progress % bar hits 100. If you're short a unit or have an extra, the manifest won't close — that's on purpose. Investigate before moving on.
3. Mark the manifest complete
Button at the top: Mark Complete. This closes receiving and makes the devices visible on the QC list.
4. Hand devices to QC, then mark them complete
Open Device Inventory → QC Handoff. Pick the batch you just received and click Hand Off to QC. That moves the devices from Pending QC to In QC.
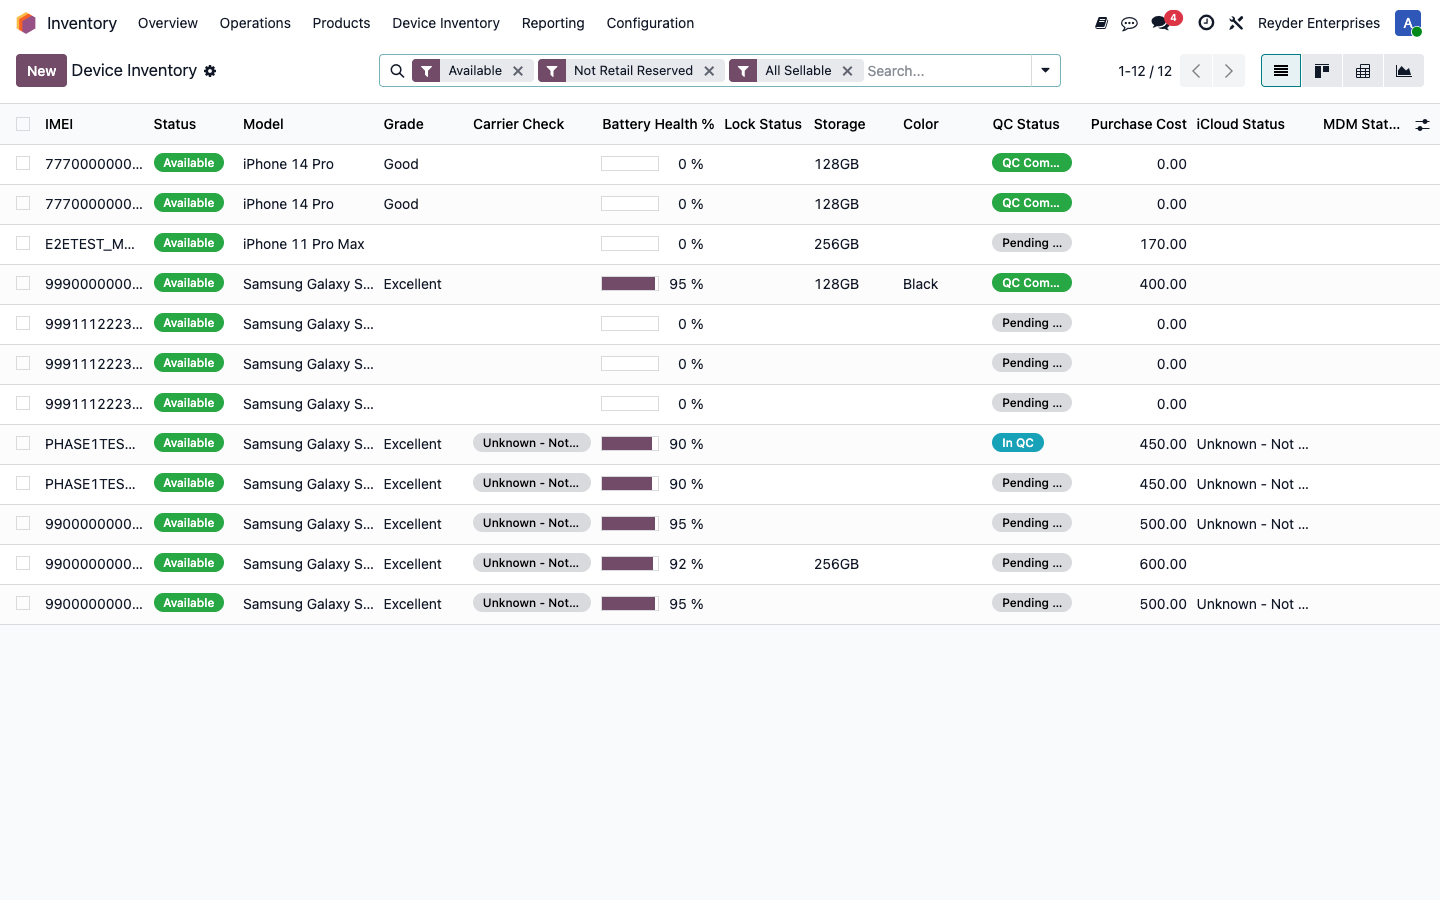
On each device form, assign the grade, sync M360 data, then click Mark QC Complete. If you do not use M360, ask admin/support about the controlled placeholder-session process or use the manager exception path later in sales. Done — devices that pass QC show Available and QC Complete in All Devices and are ready to sell without an override.
What you'll do on most days
- Check IMEI Manifests each morning for any shipments with
Readystatus. - Receive + QC + mark complete. One pass per shipment.
- Use Packing Boxes to pack outbound orders (scan → mark ready → ship). Delivery Manifests update from the box.
You are done when
- The receiving manifest is
Complete. - Devices are
AvailableandQC Complete. - Packed outbound boxes show
packed / expectedcomplete before shipment. - Any blocked scan or shortage is resolved in Odoo, not tracked only in chat or a spreadsheet.
Deeper dives
Purchasing & Receiving · Quality Control · Warehouse Operations
One-off devices
If you are adding a trade-in, replacement unit, or internal test phone with no purchase order, use Inventory → Device Inventory → Device Intake. Do not use that shortcut for supplier shipments or consigned Axis batches; those should still go through PO + IMEI Manifest receiving.
Sales track
You're taking an order from a customer and making sure the right devices get reserved and shipped.
1. Create the sales order
From the home, click Sales, then New. Pick the customer, add the device product as a line (e.g. iPhone 14 Pro 256GB Excellent), set the quantity.
Save the quotation.
2. Allocate specific devices
Click the Device Allocation tab on the sales order. This is where you pin specific IMEIs to this order — not just "any iPhone," but these three IMEIs.
Set the sales order line unit price first. Then click Allocate and pick IMEIs from the list. The system uses the line price for each allocated IMEI and automatically computes the consignment commission based on the active agreement with Axis Mobile.
Device Allocation tab missing?
The current UI hides the tab until at least one allocation exists. On a brand-new SO, ask an admin to seed the first allocation or use an existing allocation-enabled order. After the first allocation exists, the tab shows the normal Allocate button.
3. Confirm the order
Click Confirm. Three things happen automatically:
- A Delivery Manifest is created for the warehouse to pick.
- A Packing Box is created for scan-to-pack.
- The allocated devices move to status
Reserved.
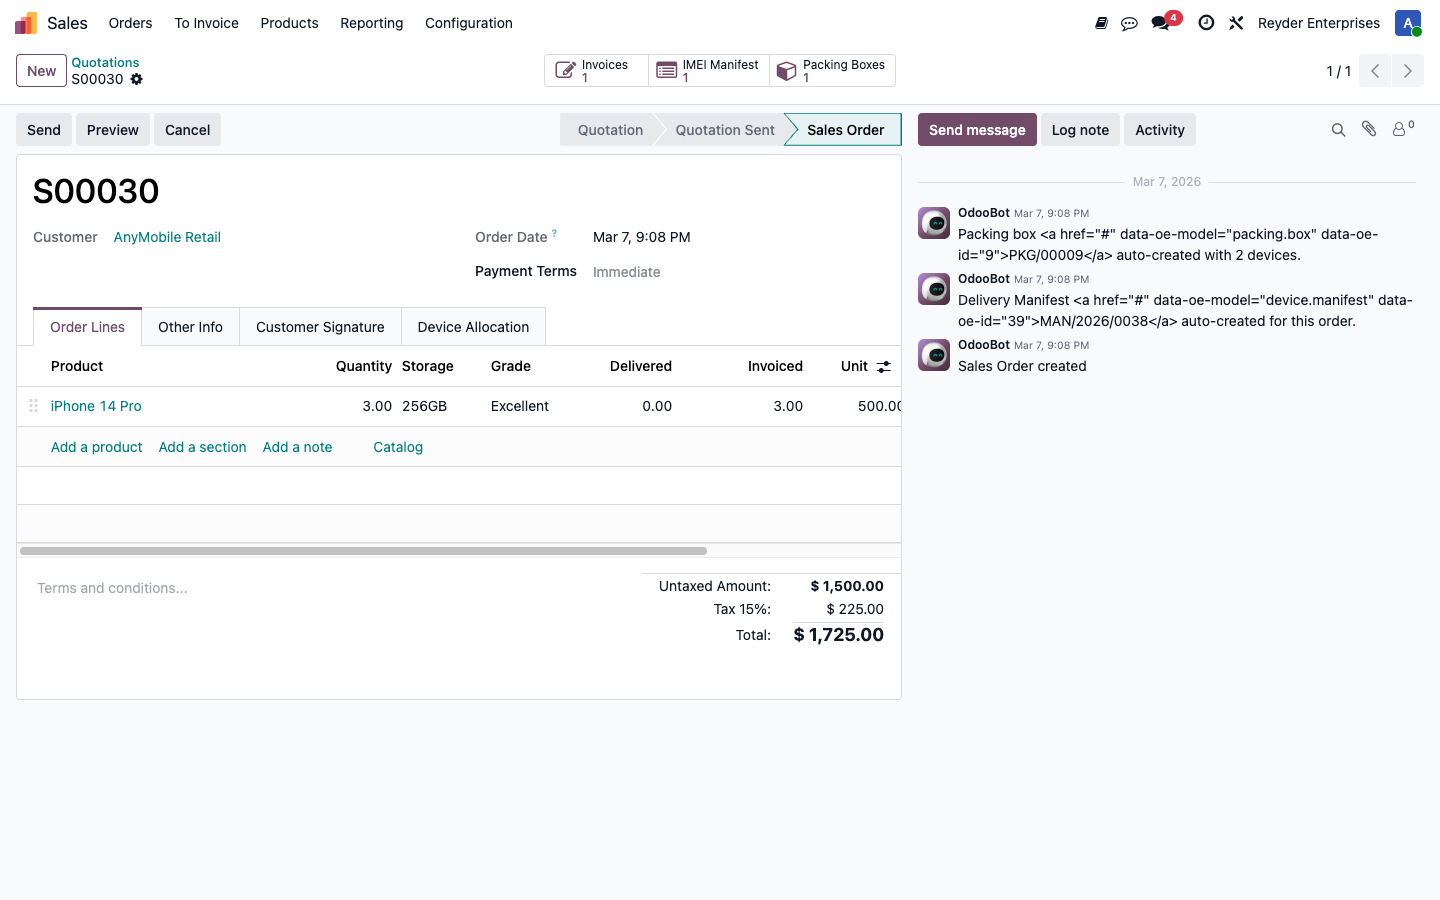
Notice the three smart buttons at the top — Invoices, IMEI Manifest, Packing Boxes. These follow the order through the rest of its life.
4. Invoice and deliver
When the warehouse marks the packing box ready and then shipped, invoicing and settlement happen automatically. You don't need to do anything else unless the customer returns a device or the order is modified.
You are done when
- The sales order is confirmed after allocation.
- The allocated count matches the customer order quantity.
- The IMEI Manifest and Packing Boxes smart buttons exist.
- The warehouse can open the packing box and see the expected devices.
Deeper dives
Accounting track
Every time the warehouse ships a consigned device, two financial documents get generated: an Owner Settlement Report (what Reyder owes Axis Mobile) and a Consignee Settlement Report (what Reyder kept). Your job is to reconcile them and mark them paid.
1. Open the settlement reports list
Go to Device Inventory → Settlement Reports.
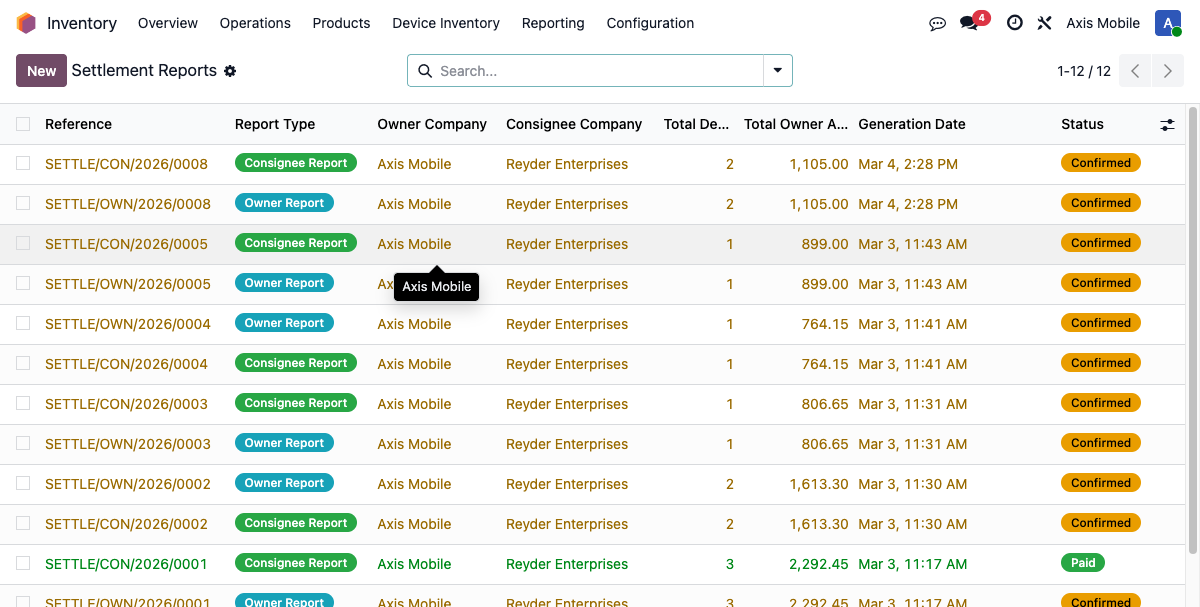
The SETTLE/CON/... references are Reyder's reports. For each one there's a paired SETTLE/OWN/... that belongs to Axis Mobile (use the Paired Report smart button on the form to jump between them).
2. Understand what each side sees
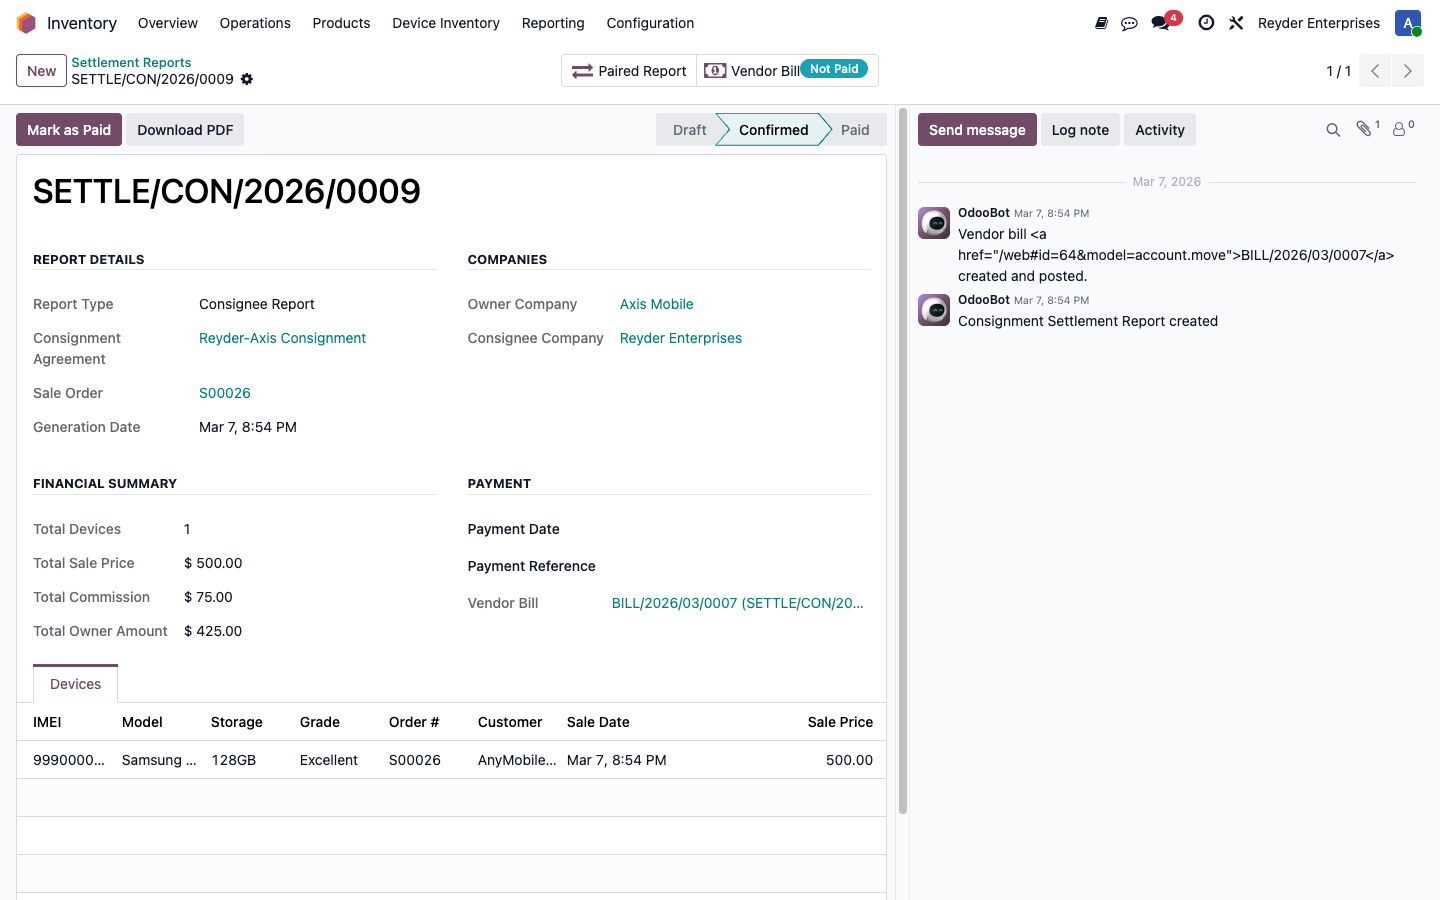
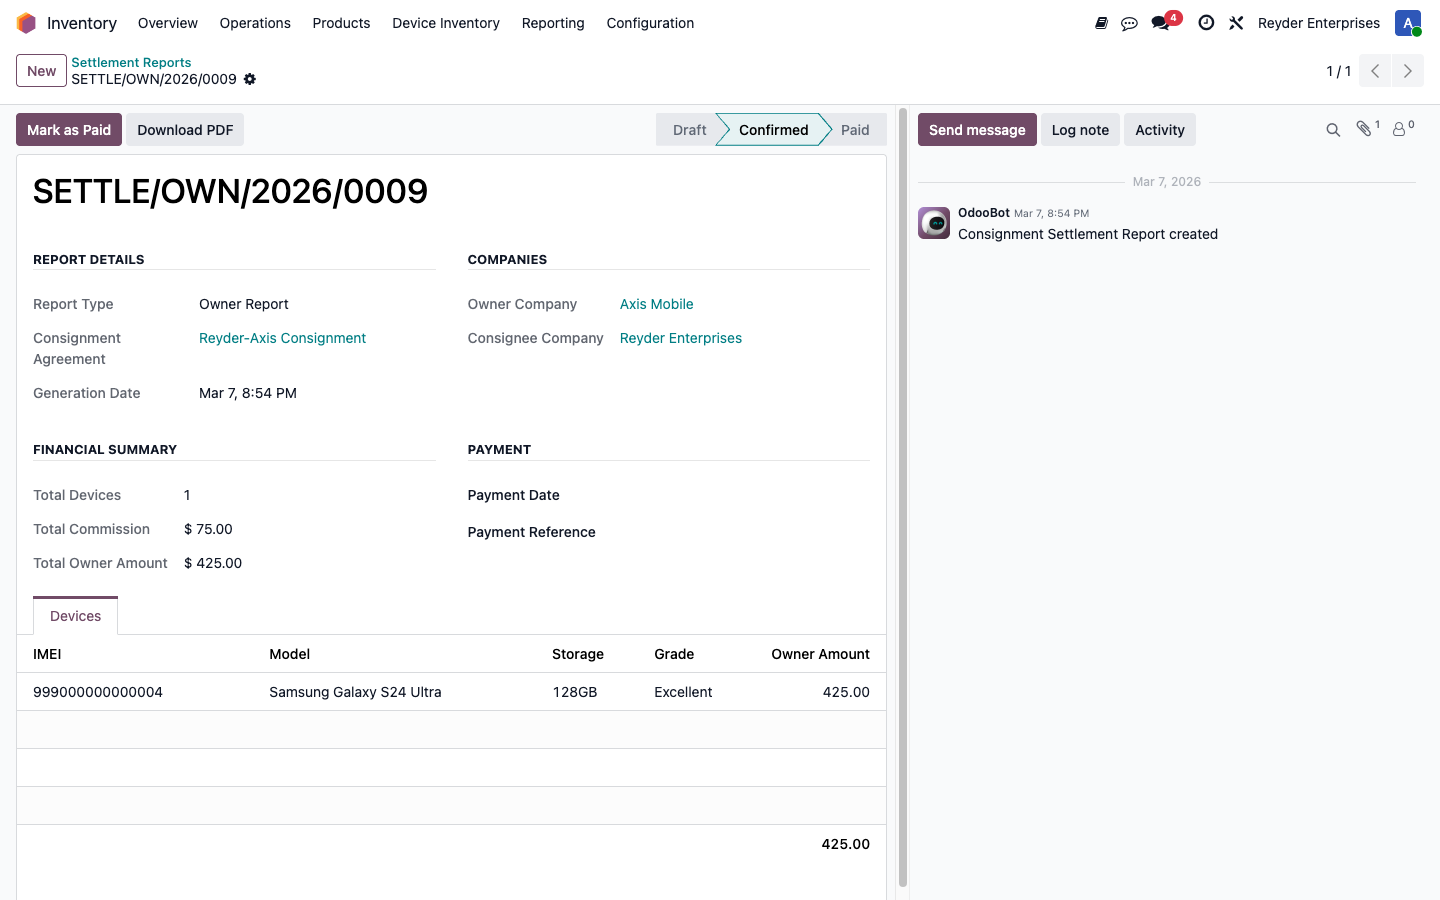
The reports are deliberately asymmetric. This matters — Axis Mobile is the device owner, not Reyder's partner in sales, and they must never see Reyder's customer or pricing data.
Full details — IMEI, model, grade, sale price, order number, customer, sale date, total commission, total owner amount, and a link to the vendor bill.
Only what they need for their accounting — IMEI, model, grade, owner amount, and summary totals. No customer, no order number, no sale price, no sale date, no per-device commission.
3. Match the vendor bill
On the consignee report, click Vendor Bill to jump to the auto-generated bill payable to Axis Mobile. The amount matches the owner-amount total. Verify, post if not yet posted, then match it against the actual payment when it goes out.
4. Mark the report as paid
Back on the consignee settlement report, after the vendor bill is paid/reconciled in Odoo, click Mark as Paid. The button will block you if the linked vendor bill is still unpaid. State moves from Confirmed to Paid. Done.
What you'll do on most days
- Review Pending Settlements for anything that hasn't been paid within your cycle.
- Match settlement reports to bank activity as payments clear.
- At month-end, pull the Owner Reports filter for Axis Mobile reporting.
You are done when
- The vendor bill is paid/reconciled.
- The
SETTLE/CON/...report is markedPaid. - The paired
SETTLE/OWN/...report is alsoPaid. - Axis never receives Reyder customer, sale price, sale date, or sale order details.
Deeper dives
Settlement Reports · Accounting Reference · Security & Multi-Company
The full flow at a glance
If you want to understand how the pieces connect, here's the happy path from a supplier shipment to a paid settlement:
Supplier ships devices
    ↓
Warehouse receives & scans IMEIs (IMEI Manifest)
    ↓
QC grades & clears them
    ↓
Sales allocates devices to a customer order
    ↓
Warehouse scans, marks ready, ships (Packing Box / Delivery Manifest)
    ↓
Customer invoice + vendor bill to Axis Mobile auto-generated
    ↓
Settlement reports auto-created (Owner + Consignee)
    ↓
Accounting marks reports as Paid
Each arrow is automatic — the system handles the handoffs. Your job is the step in front of you.
What to read next
- Training a team? → User Handoff Guide.
- Want the complete example? → End-to-End Walkthrough.
- Brand new to the system? → Setup & Configuration to understand how the pieces were configured.
- Want the big picture on a single device? → Device Lifecycle — every state a device can be in and how it moves.
- Something broken? → Troubleshooting.